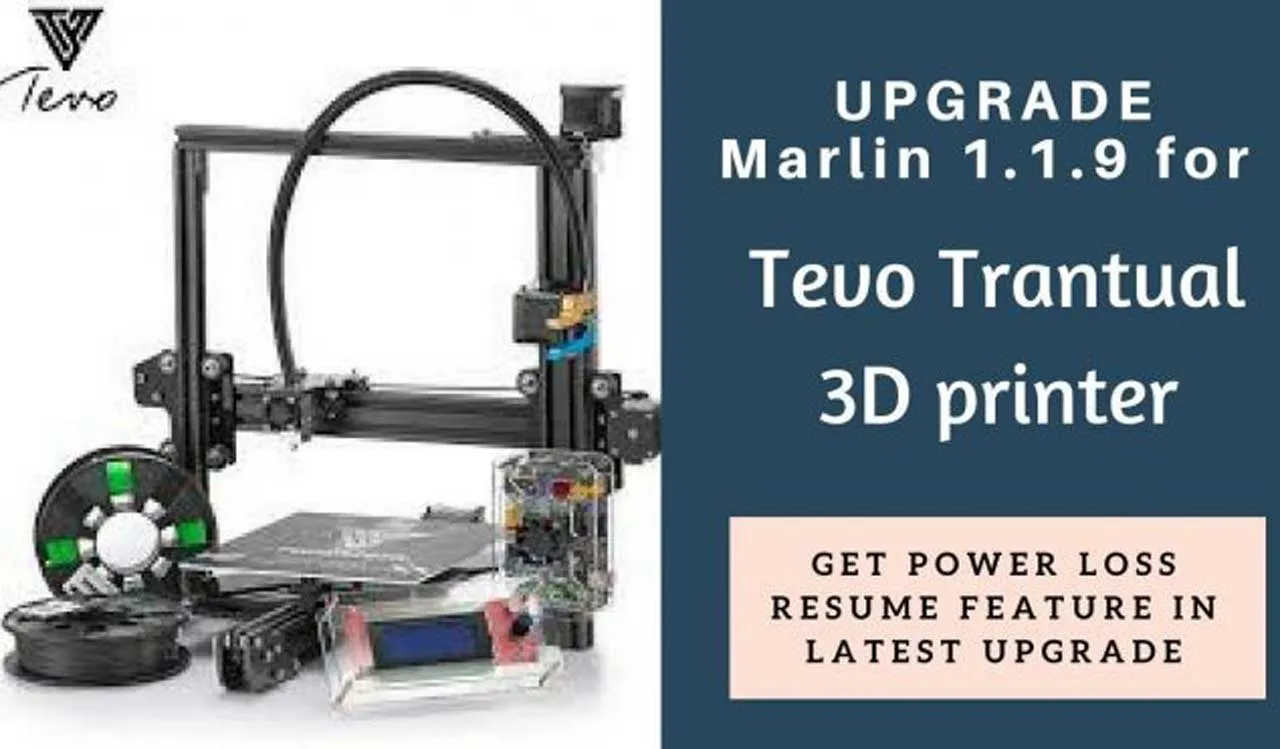
Tevo Tarantula Flash Marlin Optimization Overview
The Tevo Tarantula Flash Marlin 3D printer is a popular choice for both beginners and experienced makers. To truly unlock its potential, optimization is key. This guide provides comprehensive steps to improve print quality, speed, and overall reliability. From firmware upgrades and slicer settings to hardware enhancements and troubleshooting, we’ll cover everything you need to know. Achieving the best results requires a combination of software and hardware tweaks. By following these guidelines, you can transform your Tevo Tarantula into a high-performing 3D printing workhorse, producing stunning prints with precision and efficiency. Proper optimization ensures that you are maximizing the capabilities of your machine, saving time and filament, and ultimately enjoying a more satisfying 3D printing experience.
Essential Firmware Upgrades
Upgrading your firmware is one of the most impactful steps in optimizing your Tevo Tarantula Flash Marlin. The Flash Marlin firmware offers significant improvements over the stock firmware, including enhanced features and improved print performance. Upgrading allows for better control over printer settings, more accurate movements, and the ability to implement advanced features like linear advance and mesh bed leveling. The latest firmware versions often include bug fixes and performance improvements that contribute directly to higher quality prints and a more reliable printing experience. This ensures that your printer is running at its best, maximizing its potential and providing a smoother, more enjoyable user experience.
Marlin Firmware Installation

Installing Marlin requires some technical steps, but the benefits are well worth the effort. You will need to download the Marlin firmware from a reputable source and install the Arduino IDE. Connect your printer to your computer via USB. In the Arduino IDE, you will need to select the correct board and COM port, then upload the firmware to your printer. Before flashing the firmware, make sure to back up your original EEPROM settings. This involves configuring the settings according to your printer’s specifications, including your printer’s bed size, thermistor types, and other important parameters. Properly configured firmware ensures that your printer operates safely and efficiently, with optimized settings for superior print results.
Configuration File Adjustments
After installing Marlin, you need to configure it to match your printer’s specifications. This involves editing the configuration files within the Marlin firmware. Key adjustments include setting the correct bed size, the number of steps per millimeter for your extruder and axes, and the thermistor type for your hotend and bed. Make sure you have correctly calibrated your steps per mm. You can also enable advanced features, such as linear advance, which can significantly improve print quality. Properly configuring your firmware is critical for obtaining accurate prints. Understanding and adjusting these settings ensures that your printer will perform optimally, produce high-quality prints, and function safely.
Slicer Settings for Optimal Performance
Slicer settings play a crucial role in determining the quality and speed of your prints. The slicer converts your 3D model into instructions that your printer can understand. Correctly configuring your slicer can dramatically improve print quality and reduce printing time. Understanding how your slicer works and how the various settings affect the print process is essential for producing high-quality prints consistently. These settings control the printer’s movements, the amount of filament extruded, and the temperature of the hotend and bed. Slicer settings directly affect how the printer functions, influencing aspects such as print speed, surface finish, and dimensional accuracy. Careful consideration and adjustment of these settings enable you to optimize prints for different materials and model complexities.
Cura Slicer Configuration

Cura is a popular slicer known for its user-friendly interface and extensive settings. Start by selecting your printer profile and then configure the settings based on the filament you are using. Key settings to adjust include layer height, print speed, infill density, and temperature. For PLA, you may use a nozzle temperature of 200-220°C and a bed temperature of 60°C, while for ABS, the temperature will be higher. Experiment with different settings to find the best combination for your printer and filament. Remember to adjust your retraction settings to minimize stringing and oozing. Also, tuning the cooling settings can help achieve the desired finish. By correctly configuring your Cura settings, you can significantly enhance the quality and efficiency of your 3D prints.
Simplify3D Settings
Simplify3D is another powerful slicer that offers more advanced control over your prints. The software is known for its support structures, and its ability to produce high-quality prints. Similar to Cura, you’ll begin by selecting your printer and filament profiles. In Simplify3D, you have detailed control over every aspect of the printing process, from the extrusion multiplier to the cooling settings. Experimenting with different settings is essential to get the best results. Explore features like the ability to define different settings for different layers of your print and utilize advanced support structures. You can fine-tune settings for various filaments and model complexities. By thoroughly adjusting settings in Simplify3D, you can push your Tevo Tarantula to its maximum potential, resulting in stunning and precise prints.
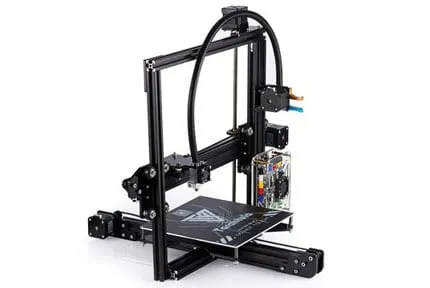
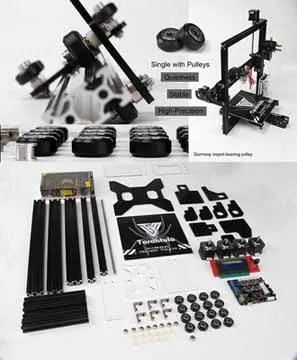
Hardware Enhancements and Modifications
While software adjustments are important, hardware upgrades can significantly boost the performance of your Tevo Tarantula. These enhancements can improve print quality, reduce noise, and increase the printer’s reliability. Upgrading the hardware is just as important as fine-tuning the firmware or adjusting slicer settings. Some modifications will be simple, while others might be more complex, requiring a good understanding of how your 3D printer works. Hardware upgrades often involve enhancing the printer’s mechanical components or improving the overall construction. It can reduce vibrations, increase the printer’s precision, and result in better prints. The choice of upgrades depends on your needs, but these are some recommendations to enhance the performance of your printer.
Bed Leveling Techniques
Proper bed leveling is the foundation of good 3D prints. Uneven bed leveling causes adhesion issues, resulting in prints that peel off the bed or have inconsistent layers. The simplest method involves manually leveling the bed using the adjustment screws at each corner, using a sheet of paper as a guide. After manual leveling, you can enable auto bed leveling by installing a sensor. Calibration involves setting the Z-offset. Leveling regularly ensures that the first layer adheres correctly and provides a solid base for the rest of your print. With a correctly leveled bed, your prints will stick firmly and start without problems, resulting in better quality and more reliable prints. Proper leveling is crucial for print success and ensures that the initial layers are perfectly placed.
Nozzle and Hotend Upgrades
Upgrading the nozzle and hotend can improve your printer’s performance and versatility. The stock nozzle on the Tevo Tarantula can be replaced with different sizes or made from different materials, like hardened steel or copper, to print with a variety of filaments, including abrasive materials or those requiring high temperatures. A high-quality nozzle can improve print quality. Additionally, you can upgrade the hotend to improve temperature consistency and allow for faster printing. A good-quality hotend is crucial for maintaining consistent temperatures, which is essential for printing with demanding filaments. Consider all options available to help improve print quality. Upgrading the nozzle and hotend will not only improve print quality but also enhance the range of filaments you can work with.
Print Quality Troubleshooting
Even with the best settings and hardware, you may encounter print quality issues. These issues can be frustrating, but with careful troubleshooting, you can identify and fix them. Troubleshooting is an important skill to have for any 3D printing enthusiast. Troubleshooting is an iterative process of identifying the cause of the problem and making appropriate adjustments. Being able to diagnose print defects and fix them will allow you to maximize your printer’s potential and reduce the amount of wasted material. Understanding the common issues and their solutions will help you resolve problems quickly and efficiently, leading to better quality prints and a more enjoyable experience.
Layer Adhesion Issues
Poor layer adhesion is a common problem. This can result from incorrect temperatures, poor bed adhesion, or insufficient cooling. Increase the nozzle temperature or reduce print speed, if the layers are not sticking together. Ensure the bed is properly leveled and the first layer is squished. Clean the bed surface. Consider using adhesives such as glue stick or a specialized printing surface. These adjustments will help the layers stick together more effectively. The result will be stronger and more durable prints. By taking the appropriate measures, you can create prints that are structurally sound and have an excellent finish.
Warping and Curling Problems
Warping and curling occur when the edges of your print lift off the bed. This is usually caused by uneven cooling or poor bed adhesion. Ensure the bed temperature is correct for the filament you are using. Using a brim or raft can provide a larger surface area for the print to adhere to the bed. Reduce the ambient temperature and the airflow around the print. Enclosing the printer can also help. By resolving these issues, you can create prints that maintain their intended shape and size. Warping can ruin a print, so it is important to know the causes and solutions to prevent it.
Stringing and Oozing Solutions
Stringing and oozing refer to the fine strands of plastic that appear between parts of your print. This is typically caused by the filament oozing out of the nozzle while the printer is moving. Adjust the retraction settings in your slicer. Increasing the retraction distance and speed can prevent stringing. Lower the nozzle temperature, and make sure your filament is dry. By properly tuning your settings and addressing any issues with the filament, you can achieve clean, precise prints without stringing. These adjustments will produce prints with clean surfaces and sharp details, enhancing the overall quality of your prints.
Advanced Printing Techniques

Once you have mastered the basics of optimizing your Tevo Tarantula, you can explore advanced printing techniques to further refine your prints and expand your capabilities. These techniques involve more complex settings and methods. Taking advantage of these advanced techniques can help to improve print quality, increase speed, and expand the range of materials that can be used. Through advanced printing techniques, you can unlock the full potential of your 3D printer and produce exceptional prints. Understanding these techniques will allow you to tackle more complex prints and achieve impressive results.
Printing with Different Materials
The Tevo Tarantula can print with a variety of filaments, including PLA, ABS, PETG, and TPU. Each material requires different settings for temperature, bed adhesion, and cooling. PLA is one of the most used filaments, and it is easy to use. ABS requires a heated bed and an enclosed environment to prevent warping. PETG offers a good balance of strength and flexibility. TPU is a flexible filament, and special settings are needed. Experiment with different settings. Adjust the nozzle temperature, bed temperature, and print speed according to the filament’s specifications. Learning to print with a variety of materials will expand the range of projects you can create. By mastering these skills, you can make use of the best properties of each material, resulting in impressive print results.
Temperature and Speed Optimization
Optimizing temperature and speed can significantly affect print quality and speed. Adjusting the nozzle temperature based on the filament type is crucial. Too low of a temperature results in poor layer adhesion, while too high results in stringing and oozing. Experimenting with print speed is essential. Faster speeds can reduce print time, but too fast will reduce the print quality. Finding the ideal balance will depend on your printer’s capabilities and the complexity of your print. Finding the right balance between print speed and temperature is important. By combining these strategies, you can optimize your Tevo Tarantula for both efficiency and quality, allowing you to produce prints faster without compromising on the final result.