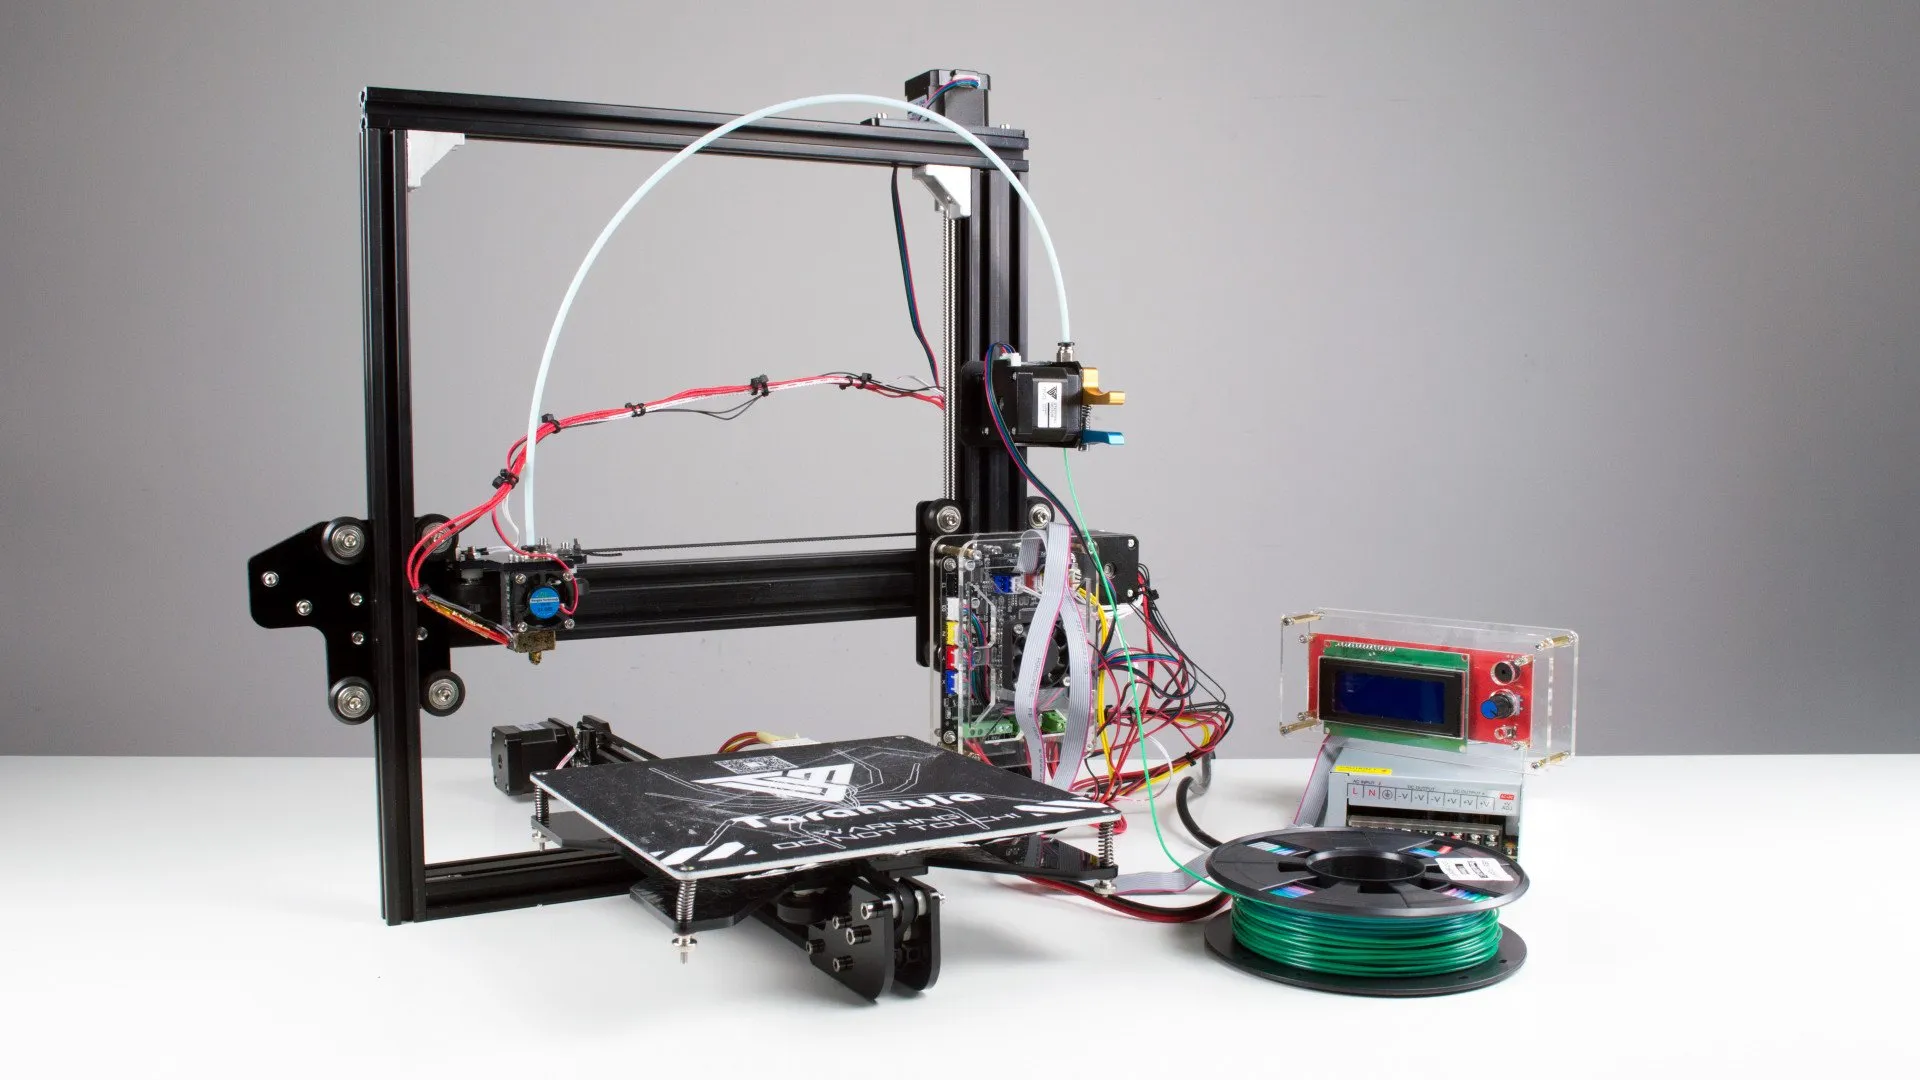
Tevo Tarantula Brasil Top 5 Upgrades
The Tevo Tarantula Brasil is a popular 3D printer known for its affordability and ease of use. However, like any entry-level machine, there’s room for improvement. Upgrading your Tevo Tarantula Brasil can significantly enhance print quality, reliability, and overall user experience. This guide explores the top 5 upgrades that will transform your 3D printing experience. Whether you’re a beginner or an experienced maker, these upgrades will help you get the most out of your printer. Investing in these upgrades can extend the life of your printer and allow you to explore more complex and demanding projects. Read on to discover how to take your Tevo Tarantula Brasil to the next level.
Upgrading the Bed
The print bed is the foundation of every successful 3D print. Upgrading your bed can dramatically improve adhesion, reduce warping, and make removing finished prints easier. The stock bed on the Tevo Tarantula Brasil can be improved with a few key modifications. A stable and well-prepared bed ensures that the first layer adheres properly, which is critical for the success of the entire print. Consider these points when upgrading your print bed.
Considerations for a Heated Bed Upgrade

If your printer doesn’t have a heated bed or if you want to improve the performance of your current one, a heated bed upgrade is a must. A heated bed helps prevent warping, especially when printing with ABS and other materials that are prone to contraction as they cool. Make sure your power supply can handle the extra load. Check the bed’s temperature consistency across the surface for optimal results. Consider insulation to help the bed maintain heat more efficiently. These aspects will improve the consistency and quality of your prints. (Image: heated-bed-upgrade.webp)
Benefits of a Glass Bed Upgrade
Swapping to a glass bed offers a smooth, flat surface that’s easy to level and provides excellent adhesion. Prints adhere well to the glass, and once cooled, they release easily. Applying a thin layer of glue stick or using specialized bed adhesives further enhances adhesion. Glass beds are also easy to clean and maintain, making them a great long-term upgrade. The result is a cleaner first layer and fewer print failures due to bed adhesion issues. (Image: glass-bed-upgrade.webp)
Extruder Enhancements
The extruder is responsible for feeding filament to the hot end and controlling the flow of plastic. Upgrading the extruder can improve print quality, reduce clogging, and allow for the use of a wider range of filaments. Several options are available, each offering different benefits in terms of precision and reliability. Upgrading the extruder can have a significant impact on the consistency of your prints. These upgrades can also improve the overall speed and efficiency of the printing process.
Upgrading the Extruder Motor

A more powerful extruder motor can provide better control over filament extrusion, reducing under-extrusion and improving print detail. Upgrading the motor can also allow for faster printing speeds without sacrificing quality. Ensure the motor is compatible with your printer’s mainboard and power supply. Consider adding a motor damper to reduce noise and vibrations for smoother operation. The upgrade will have a direct impact on print quality, particularly when printing fine details. (Image: extruder-motor-upgrade.webp)
Benefits of a Direct Drive Extruder
A direct drive extruder mounts the extruder directly above the hot end, reducing the distance the filament must travel. This setup provides more precise control over filament flow, especially for flexible filaments. Direct drive extruders typically offer better retraction performance, leading to less stringing and improved print quality. However, they can add weight to the print head, potentially affecting print speed and stability. These advantages make direct drive extruders ideal for detailed prints. (Image: direct-drive-extruder.webp)
Motherboard and Firmware Upgrades
Upgrading the motherboard and firmware is an excellent way to improve the printer’s overall performance and add new features. The stock motherboard on the Tevo Tarantula Brasil can be limiting, especially if you want to implement advanced features. This upgrade provides more control over your printer’s functionality. Modern motherboards offer better processing power and more options for customization. This helps increase efficiency and improve print quality.
Why Upgrade the Motherboard

A modern motherboard can improve print quality, offer smoother motion control, and provide support for advanced features such as auto bed leveling and Wi-Fi connectivity. Upgrading the motherboard can also improve the printer’s overall performance and reduce noise. These boards offer better processing power, which results in more precise movements and faster print times. They also allow for features that enhance usability and precision.
Benefits of Marlin Firmware
Marlin is a popular open-source firmware for 3D printers that offers many features and customization options. It supports various advanced features such as auto bed leveling, thermal runaway protection, and more precise control over printing parameters. Marlin is regularly updated with new features and bug fixes, ensuring your printer stays up-to-date. The firmware is highly customizable, letting users fine-tune their printing experience. (Image: marlin-firmware.webp)
Power Supply Unit (PSU) Upgrade
The power supply unit (PSU) provides power to all components of the printer. Upgrading the PSU can improve reliability and provide additional headroom for future upgrades. A good quality PSU is critical for the safety and performance of your 3D printer. Choosing the right PSU ensures all your printer’s components receive adequate and stable power. Selecting the correct PSU is vital for the overall safety and the quality of your prints.
Safety Considerations for PSU Upgrades

When upgrading your PSU, always ensure you are using a unit with the correct voltage and amperage ratings. Double-check all wiring connections to avoid shorts or electrical hazards. Consider adding a fuse to protect the printer from overcurrent situations. If you’re not comfortable working with electronics, seek assistance from a qualified technician. Prioritize safety when dealing with electricity to protect both yourself and your printer. (Image: psu-upgrade.webp)
Benefits of a More Powerful PSU
A more powerful PSU can provide stable power to all components, especially when running upgrades like a heated bed or a direct drive extruder. A higher-quality PSU can also improve the printer’s overall performance and reduce the risk of power-related issues. A reliable PSU is essential for consistent and reliable 3D printing. A well-chosen PSU provides a buffer for future upgrades.
Firmware and Software
Firmware and software upgrades can significantly enhance your 3D printing experience. Upgrading the firmware, like switching to Marlin, unlocks many new features and improves the printer’s overall performance. Also consider the printing software. A good slicer program is essential for preparing your models for printing. Proper settings in the slicer can make a huge difference in print quality. These improvements ensure optimal performance and ease of use.
Leveling the Bed

Proper bed leveling is crucial for successful 3D printing. Even with the best upgrades, an unlevel bed can lead to adhesion problems and print failures. Regular bed leveling ensures that the first layer sticks properly to the bed, which is essential. Bed leveling should be done regularly to ensure consistency and reduce printing issues. Accurate leveling provides a strong foundation for your prints.
Importance of Proper Bed Leveling
A level bed ensures that the first layer of your print adheres correctly, preventing warping and other print issues. If the bed isn’t level, one side of your print may be squished while the other isn’t, resulting in poor adhesion and print failure. Leveling your bed is a fundamental step in the 3D printing process. Take the time to ensure your bed is level before each print to ensure the success of your projects. (Image: bed-leveling.webp)
Manual Bed Leveling Techniques
Manual bed leveling involves adjusting the bed’s height using screws or other mechanisms. Use a piece of paper between the nozzle and the bed to gauge the distance. Adjust the bed screws until the paper just barely catches on the nozzle. This technique requires patience and practice, but it’s a reliable method for achieving a level bed. Make sure to level at multiple points on the bed to ensure an even surface. Regular adjustments improve the accuracy of your prints.
Using Auto Bed Leveling

Auto bed leveling uses a sensor to automatically map the bed surface and compensate for any imperfections. This can greatly simplify the leveling process and improve print quality. Install the appropriate firmware and configure the sensor for best results. Auto bed leveling provides a more consistent printing experience and reduces the need for manual adjustments. It simplifies the process and ensures the first layer adheres well to the bed.
Optimizing Print Quality
Optimizing print quality involves more than just upgrades. It’s also about understanding the common issues that can arise and how to address them. Regular maintenance and adjustments are essential for achieving the best possible prints. Addressing common print quality issues improves the final result of your prints. Fine-tuning your printer’s settings is also essential to ensure high-quality prints.
Troubleshooting Common Print Issues
Understanding common print issues such as warping, stringing, and layer shifting can help you diagnose and fix problems quickly. Warping is caused by uneven cooling and poor bed adhesion. Stringing occurs when the filament oozes from the nozzle while traveling. Layer shifting can be caused by loose belts or motor issues. Knowing these issues enables you to solve them more efficiently. The solution involves investigating and addressing the root causes of the problems.
Extruder and Nozzle Issues

Extruder and nozzle issues such as clogs, under-extrusion, and over-extrusion are common. Clogs can be caused by debris or incorrect temperature settings. Under-extrusion results in gaps or weak layers, while over-extrusion causes excess material. These issues can be resolved by cleaning the nozzle, calibrating the extruder, and adjusting the temperature settings. Regular maintenance and the right adjustments can improve print quality. These issues affect the accuracy and appearance of your prints.
Bed Adhesion Issues
Bed adhesion problems can lead to warping and print failures. Ensure your bed is clean and properly leveled. Using adhesives like glue stick or blue painter’s tape can significantly improve adhesion. Adjusting the bed temperature to the recommended value for the filament you’re using is also important. Ensuring proper bed adhesion increases the chance of successful printing. This is crucial for the first layer and is essential for the rest of the print.